This isn't a quiz. I'm going to run you through 2 physical tests — you'll need your rope.
By the end, you'll know your #1 blocker and exactly what to focus on in Week 1.
🪢
Grab Your Rope First
Find a small open space and grab your jump rope before you hit play. You'll be doing real reps between each step.
2 physical tests~10 minutesPersonalized result
S
Spencer — Coach
2:15
Watched
Watch the video above to unlock your first test ↑
Test 1 of 3
The Baseline Test
Watch the video – then grab your rope and do the 1st test.
S
Spencer — Coach
1:45
Watched
Your Task
Attempt 10 double unders right now. Don't overthink it — this establishes your natural movement baseline.
Watch the video above first — then your task will unlock ↑
Test 1 of 3 — You're On
Go. Do Your 10 Reps.
You've got 30 seconds. Go ahead and attempt your 10 reps.
0:30
seconds remaining
Test 1 Result
What Actually Happened?
Be honest — this determines your diagnosis.
Select one answer
Test 2 of 3
The Rope Control Test
This isolates whether the problem is your wrist speed or your jump timing.
S
Spencer — Coach
1:30
Watched
Your Task
Do 10 single-unders right now. Normal pace — just spin the rope once per jump. Notice whether singles feel effortless or choppy.
Watch the video above first ↑
Test 2 of 3
The Body Shape Test
You're making contact — the problem is what your body is doing mid-rep.
S
Spencer — Coach
2:00
Watched
Your Task
Film yourself from TWO angles — directly from the side and directly from the front. Do 15–20 reps per clip. Watch it back and match what you see to the images on the next screen.
Test 2 of 3
The Capacity Test
Your skill is there. Let's find exactly where your engine drops off.
S
Spencer — Coach
1:45
Watched
Your Task
5 sets of 20 double unders. 15 seconds rest between sets. Note what starts to break down as the sets accumulate.
Watch the video above first ↑
Test 2 of 3 — You're On
Go. 5 Sets of 20.
15 seconds rest between sets. Note where things start to break down.
3:00
remaining
Test 2 — What Did You Feel?
Singles — What Did You Feel?
Be specific — this tells me exactly what's blocking you.
Select one answer
Test 2 — What Did You See?
What Did You See on Camera?
Pick the fault that stands out most in your footage.
Instructions
Watch both clips back. Match what you see to one of the images below.
Dolphin Kick
Dolphin Kick
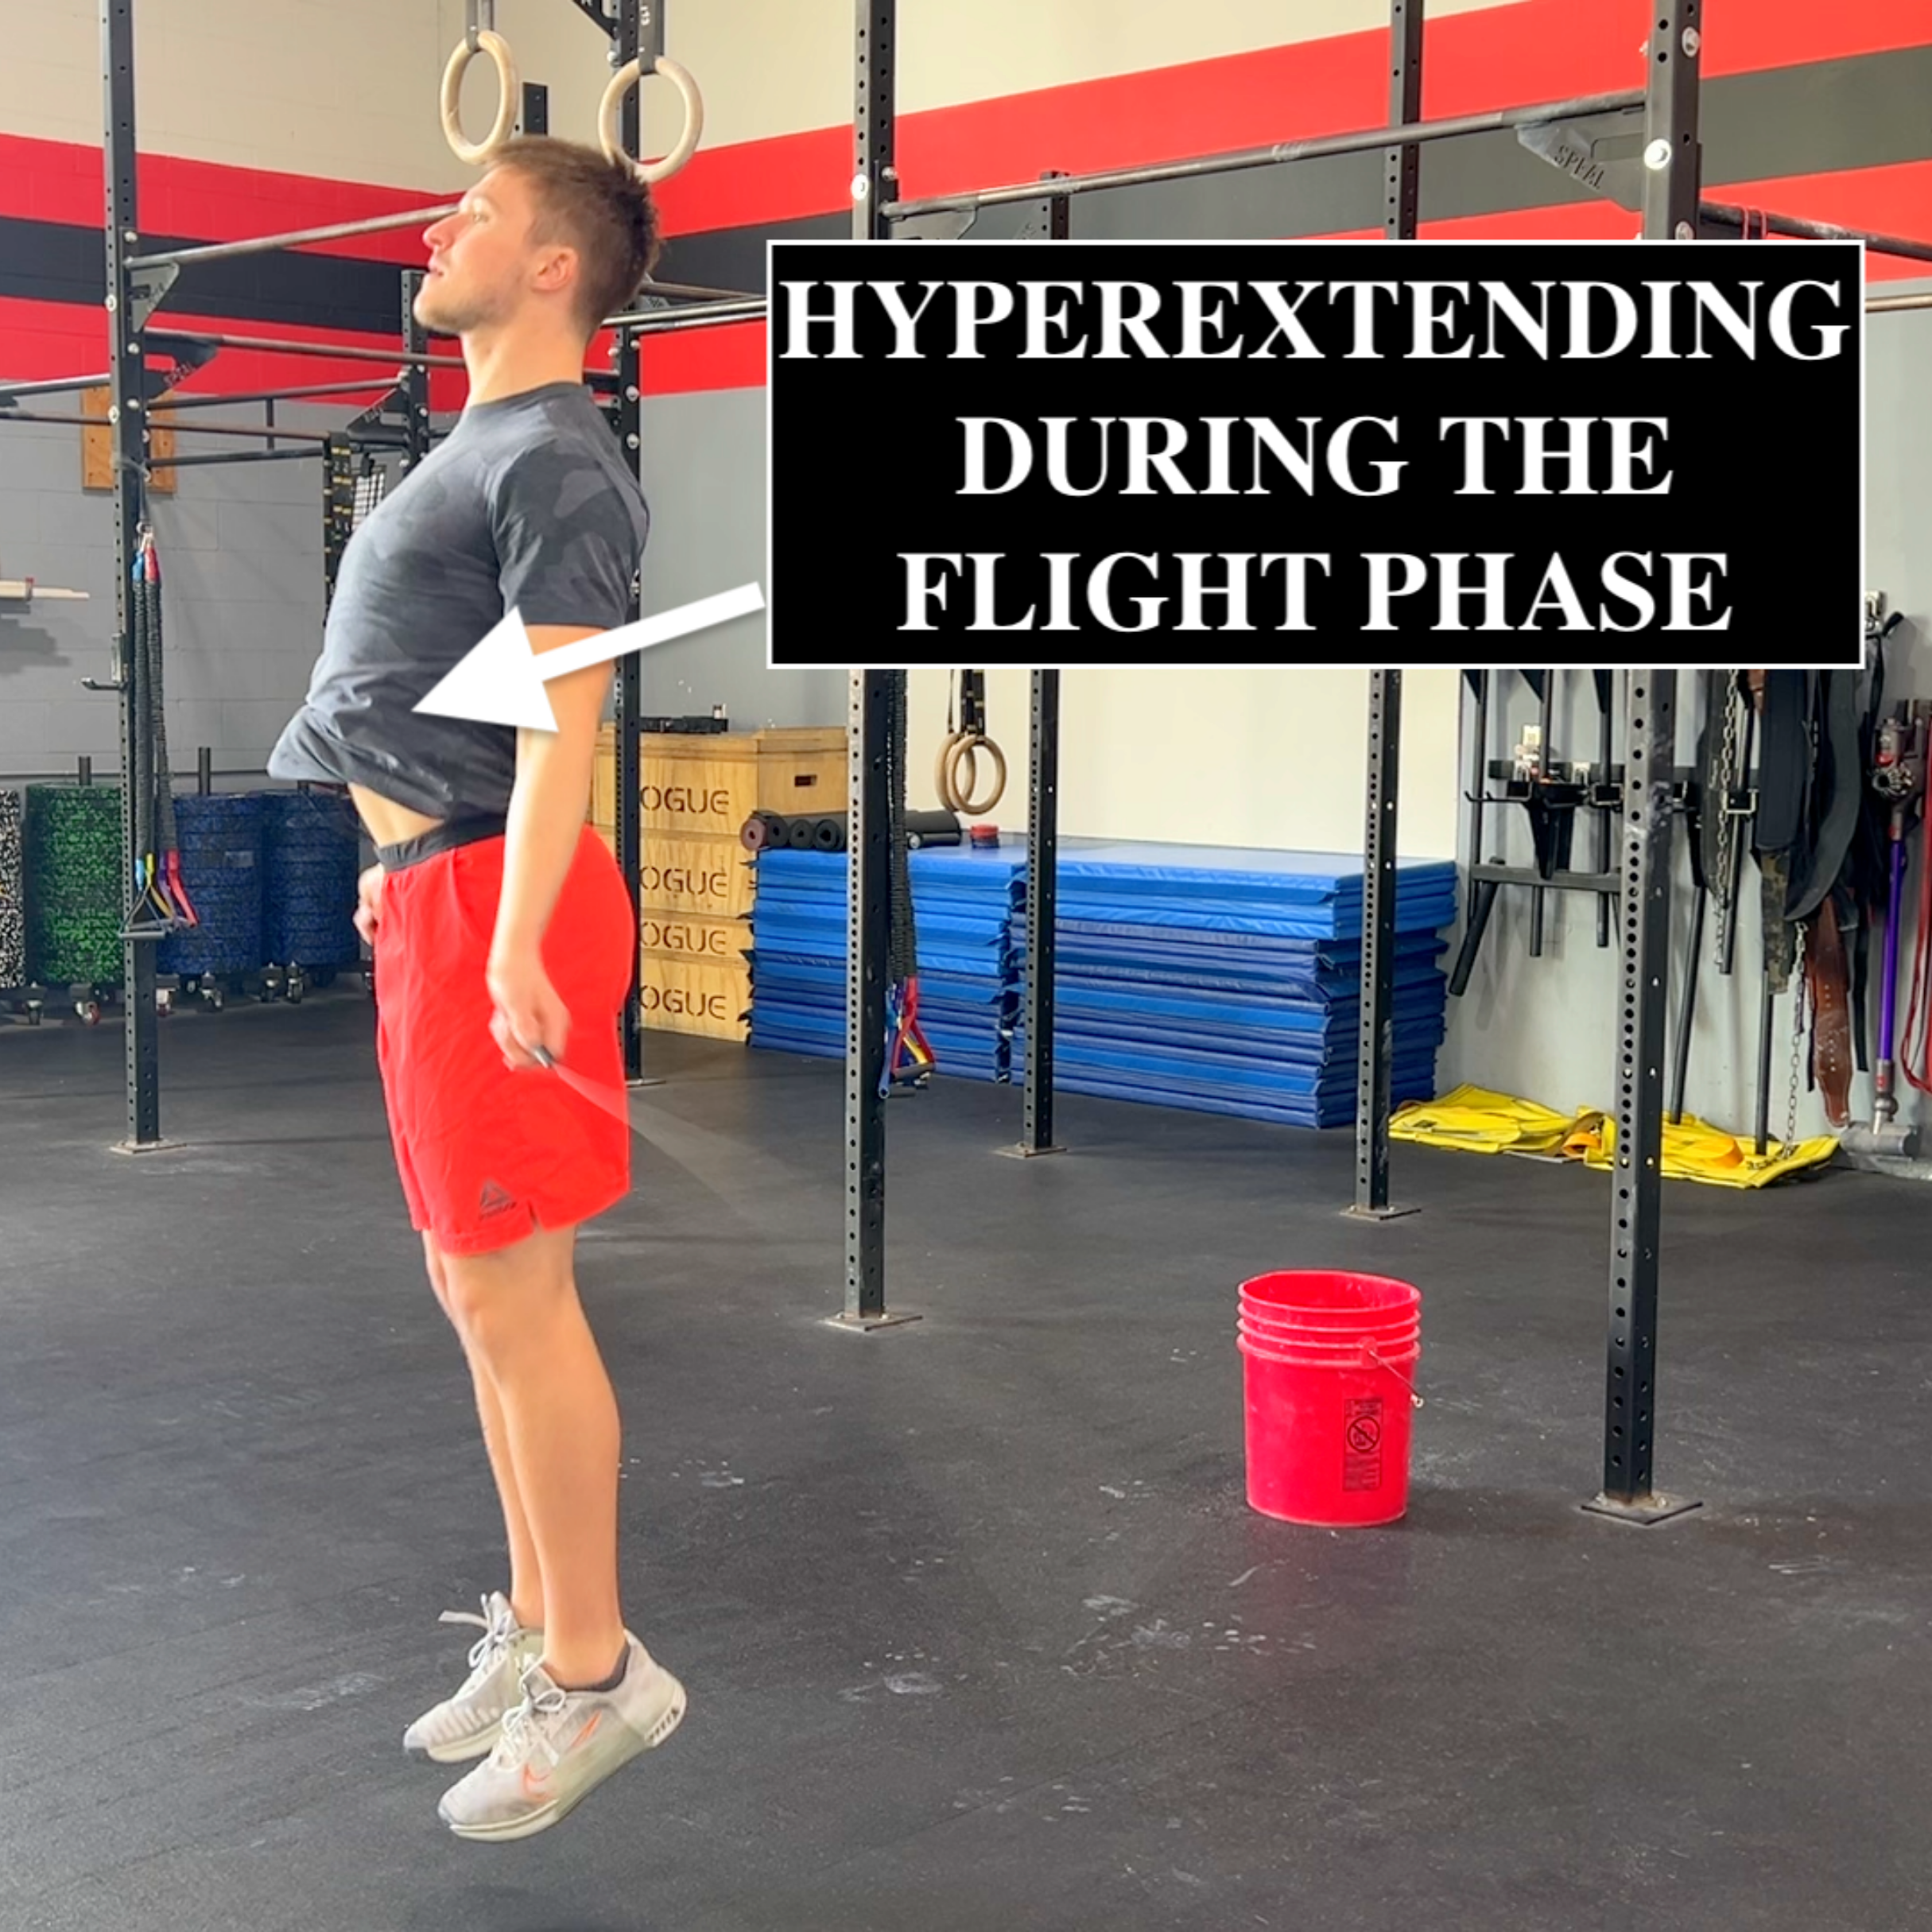
Hyperextending
Hyperextending
Forward Drift
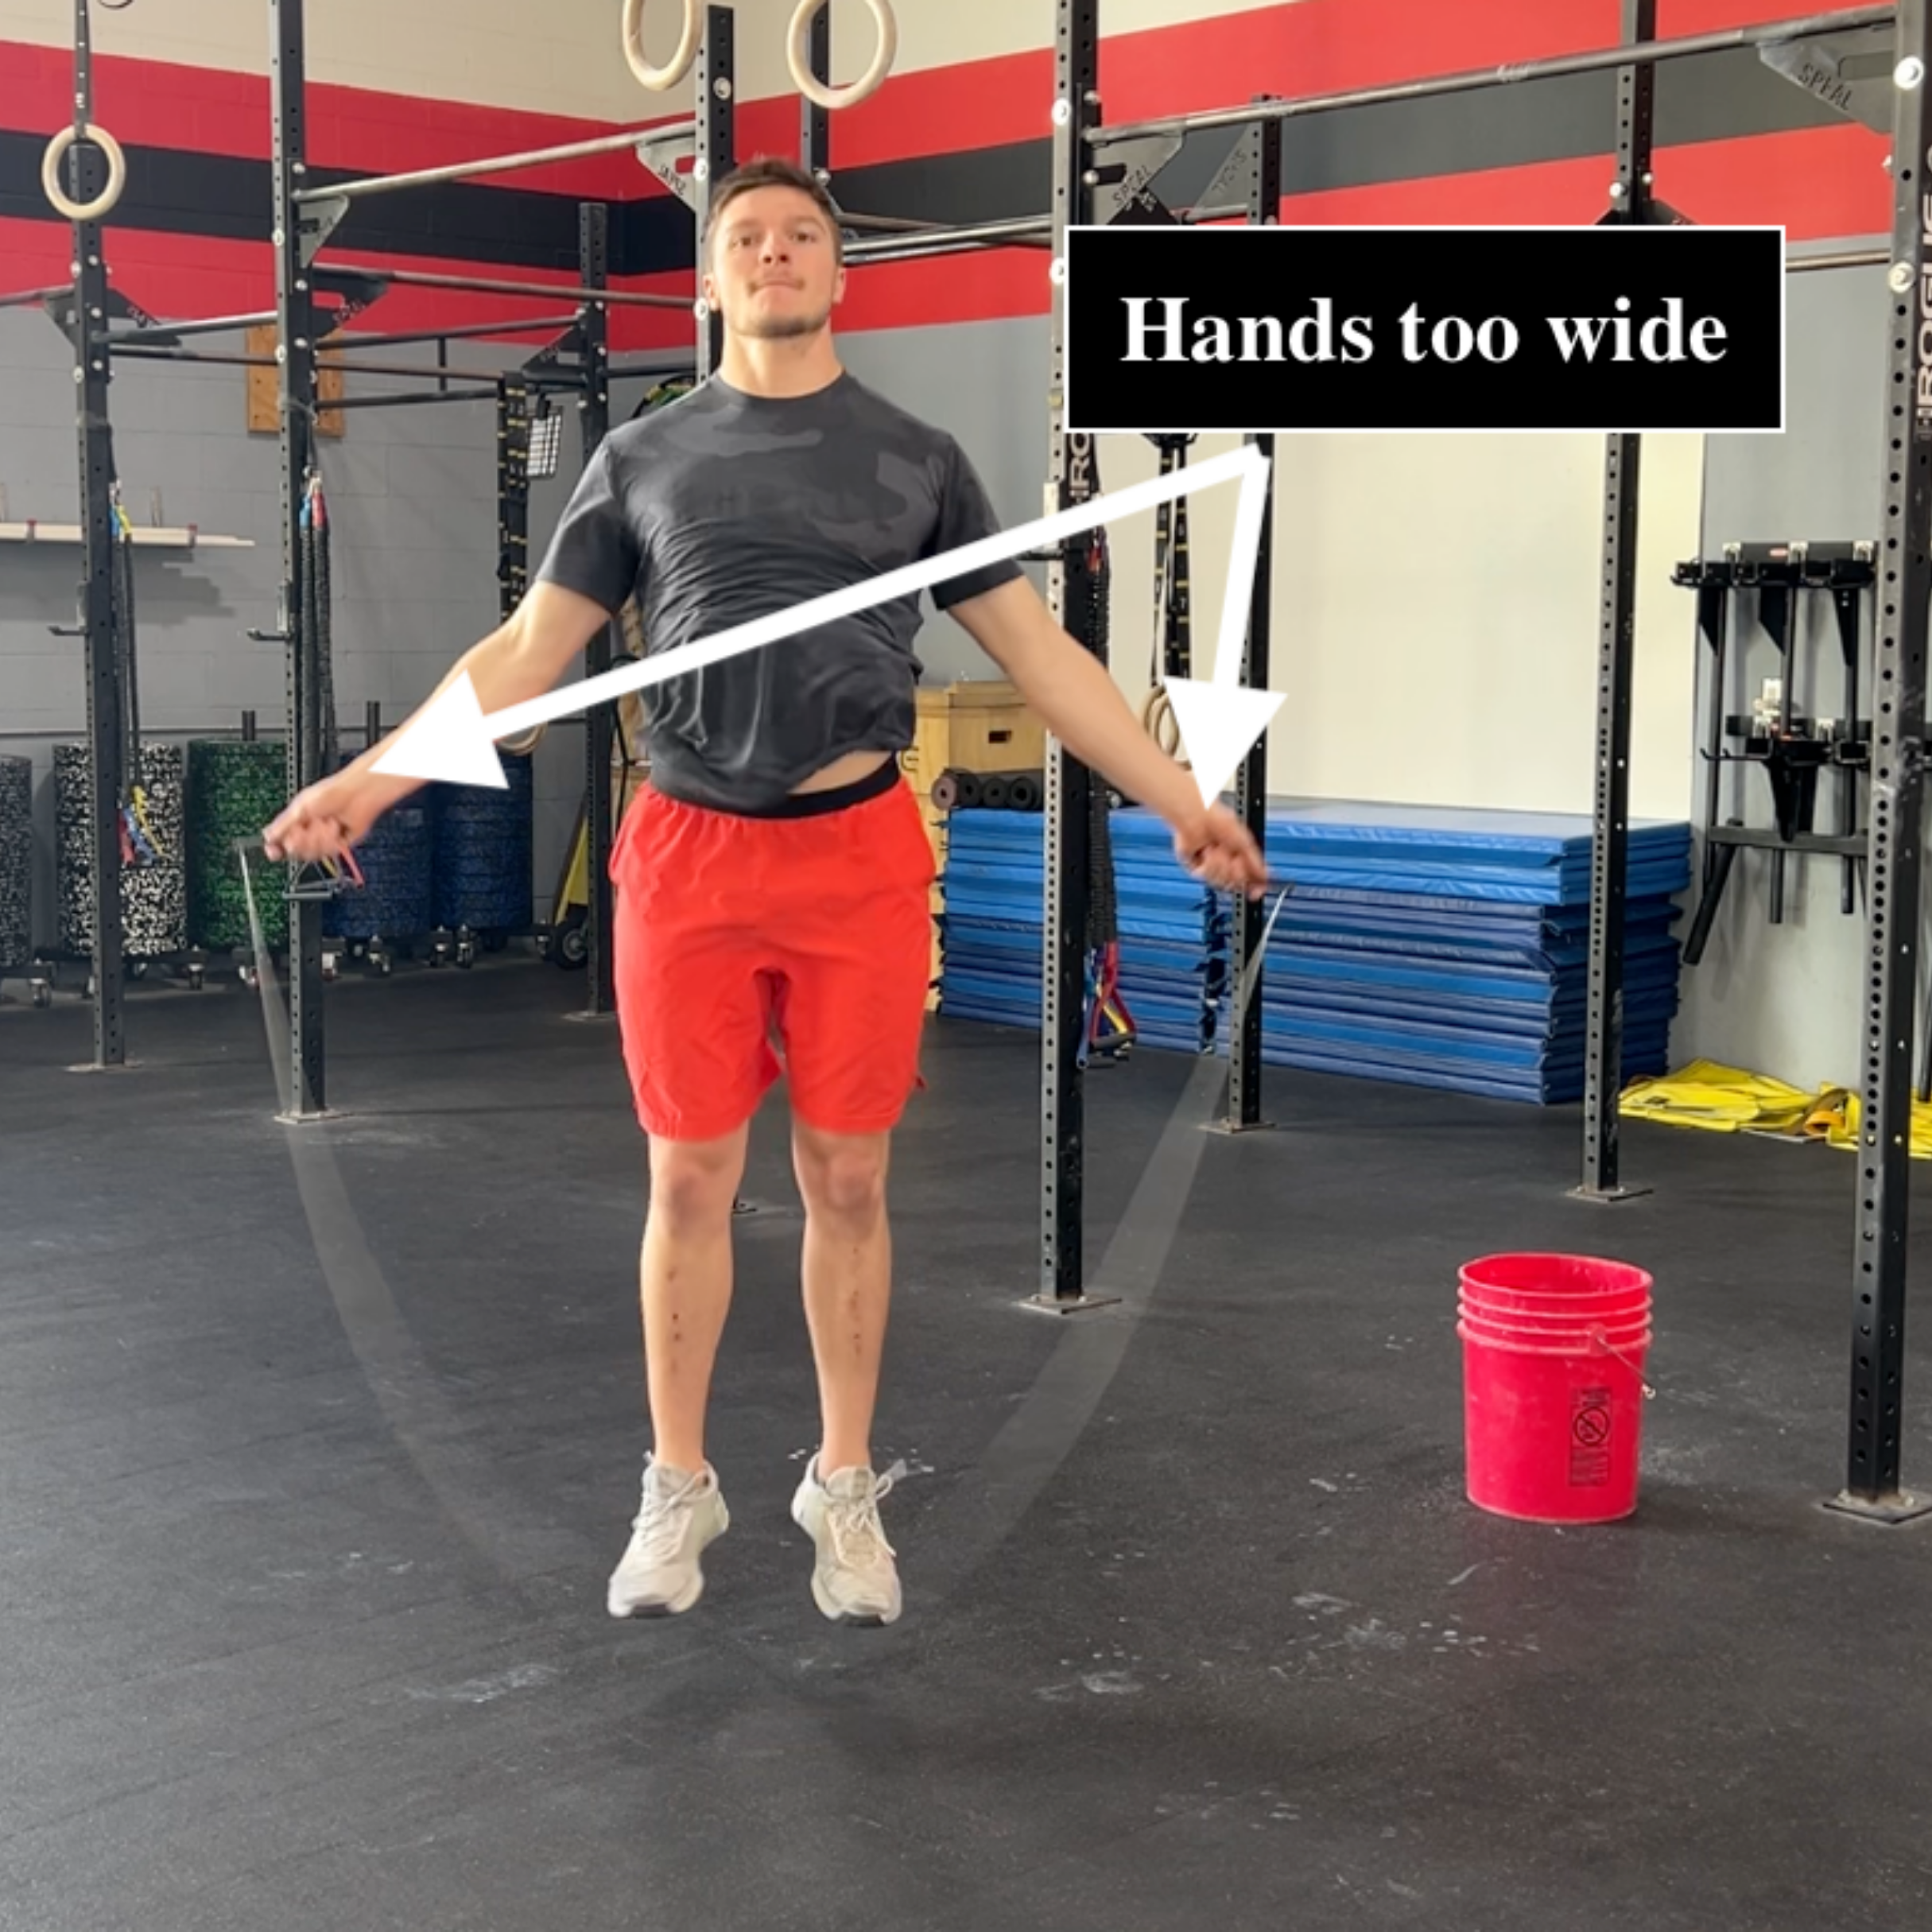
Hands Too Wide
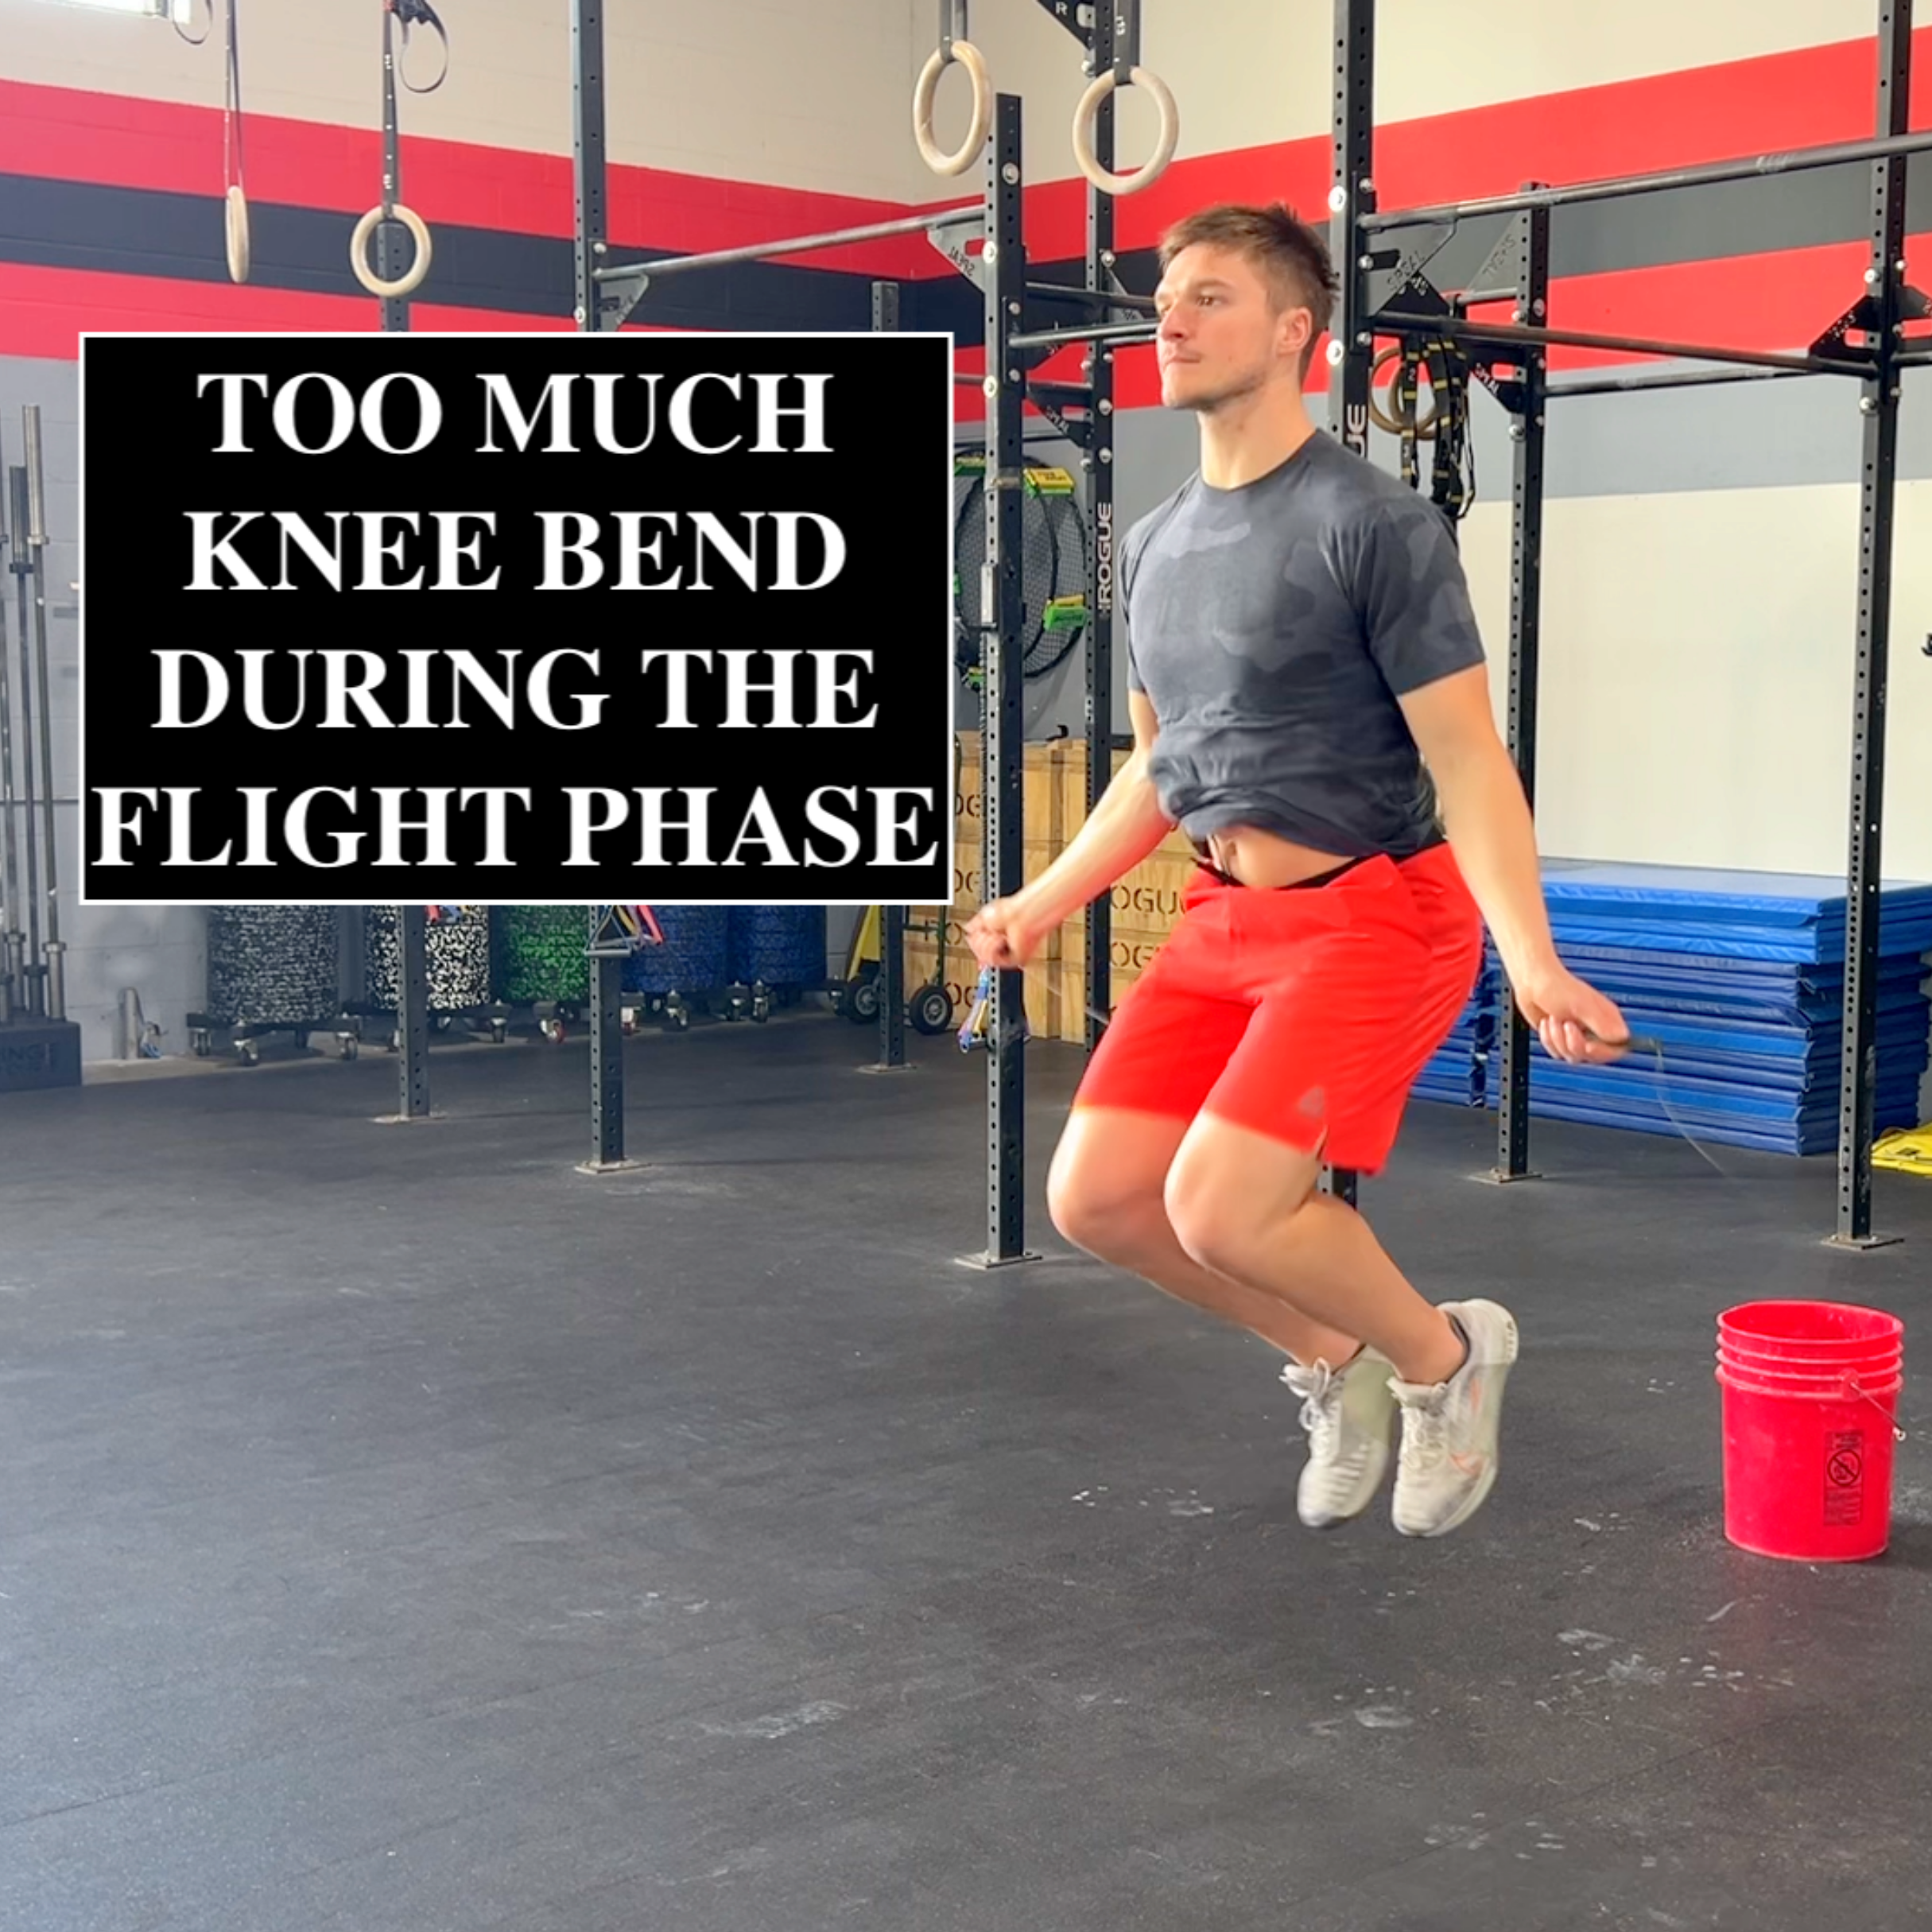
High Knees
High Knees
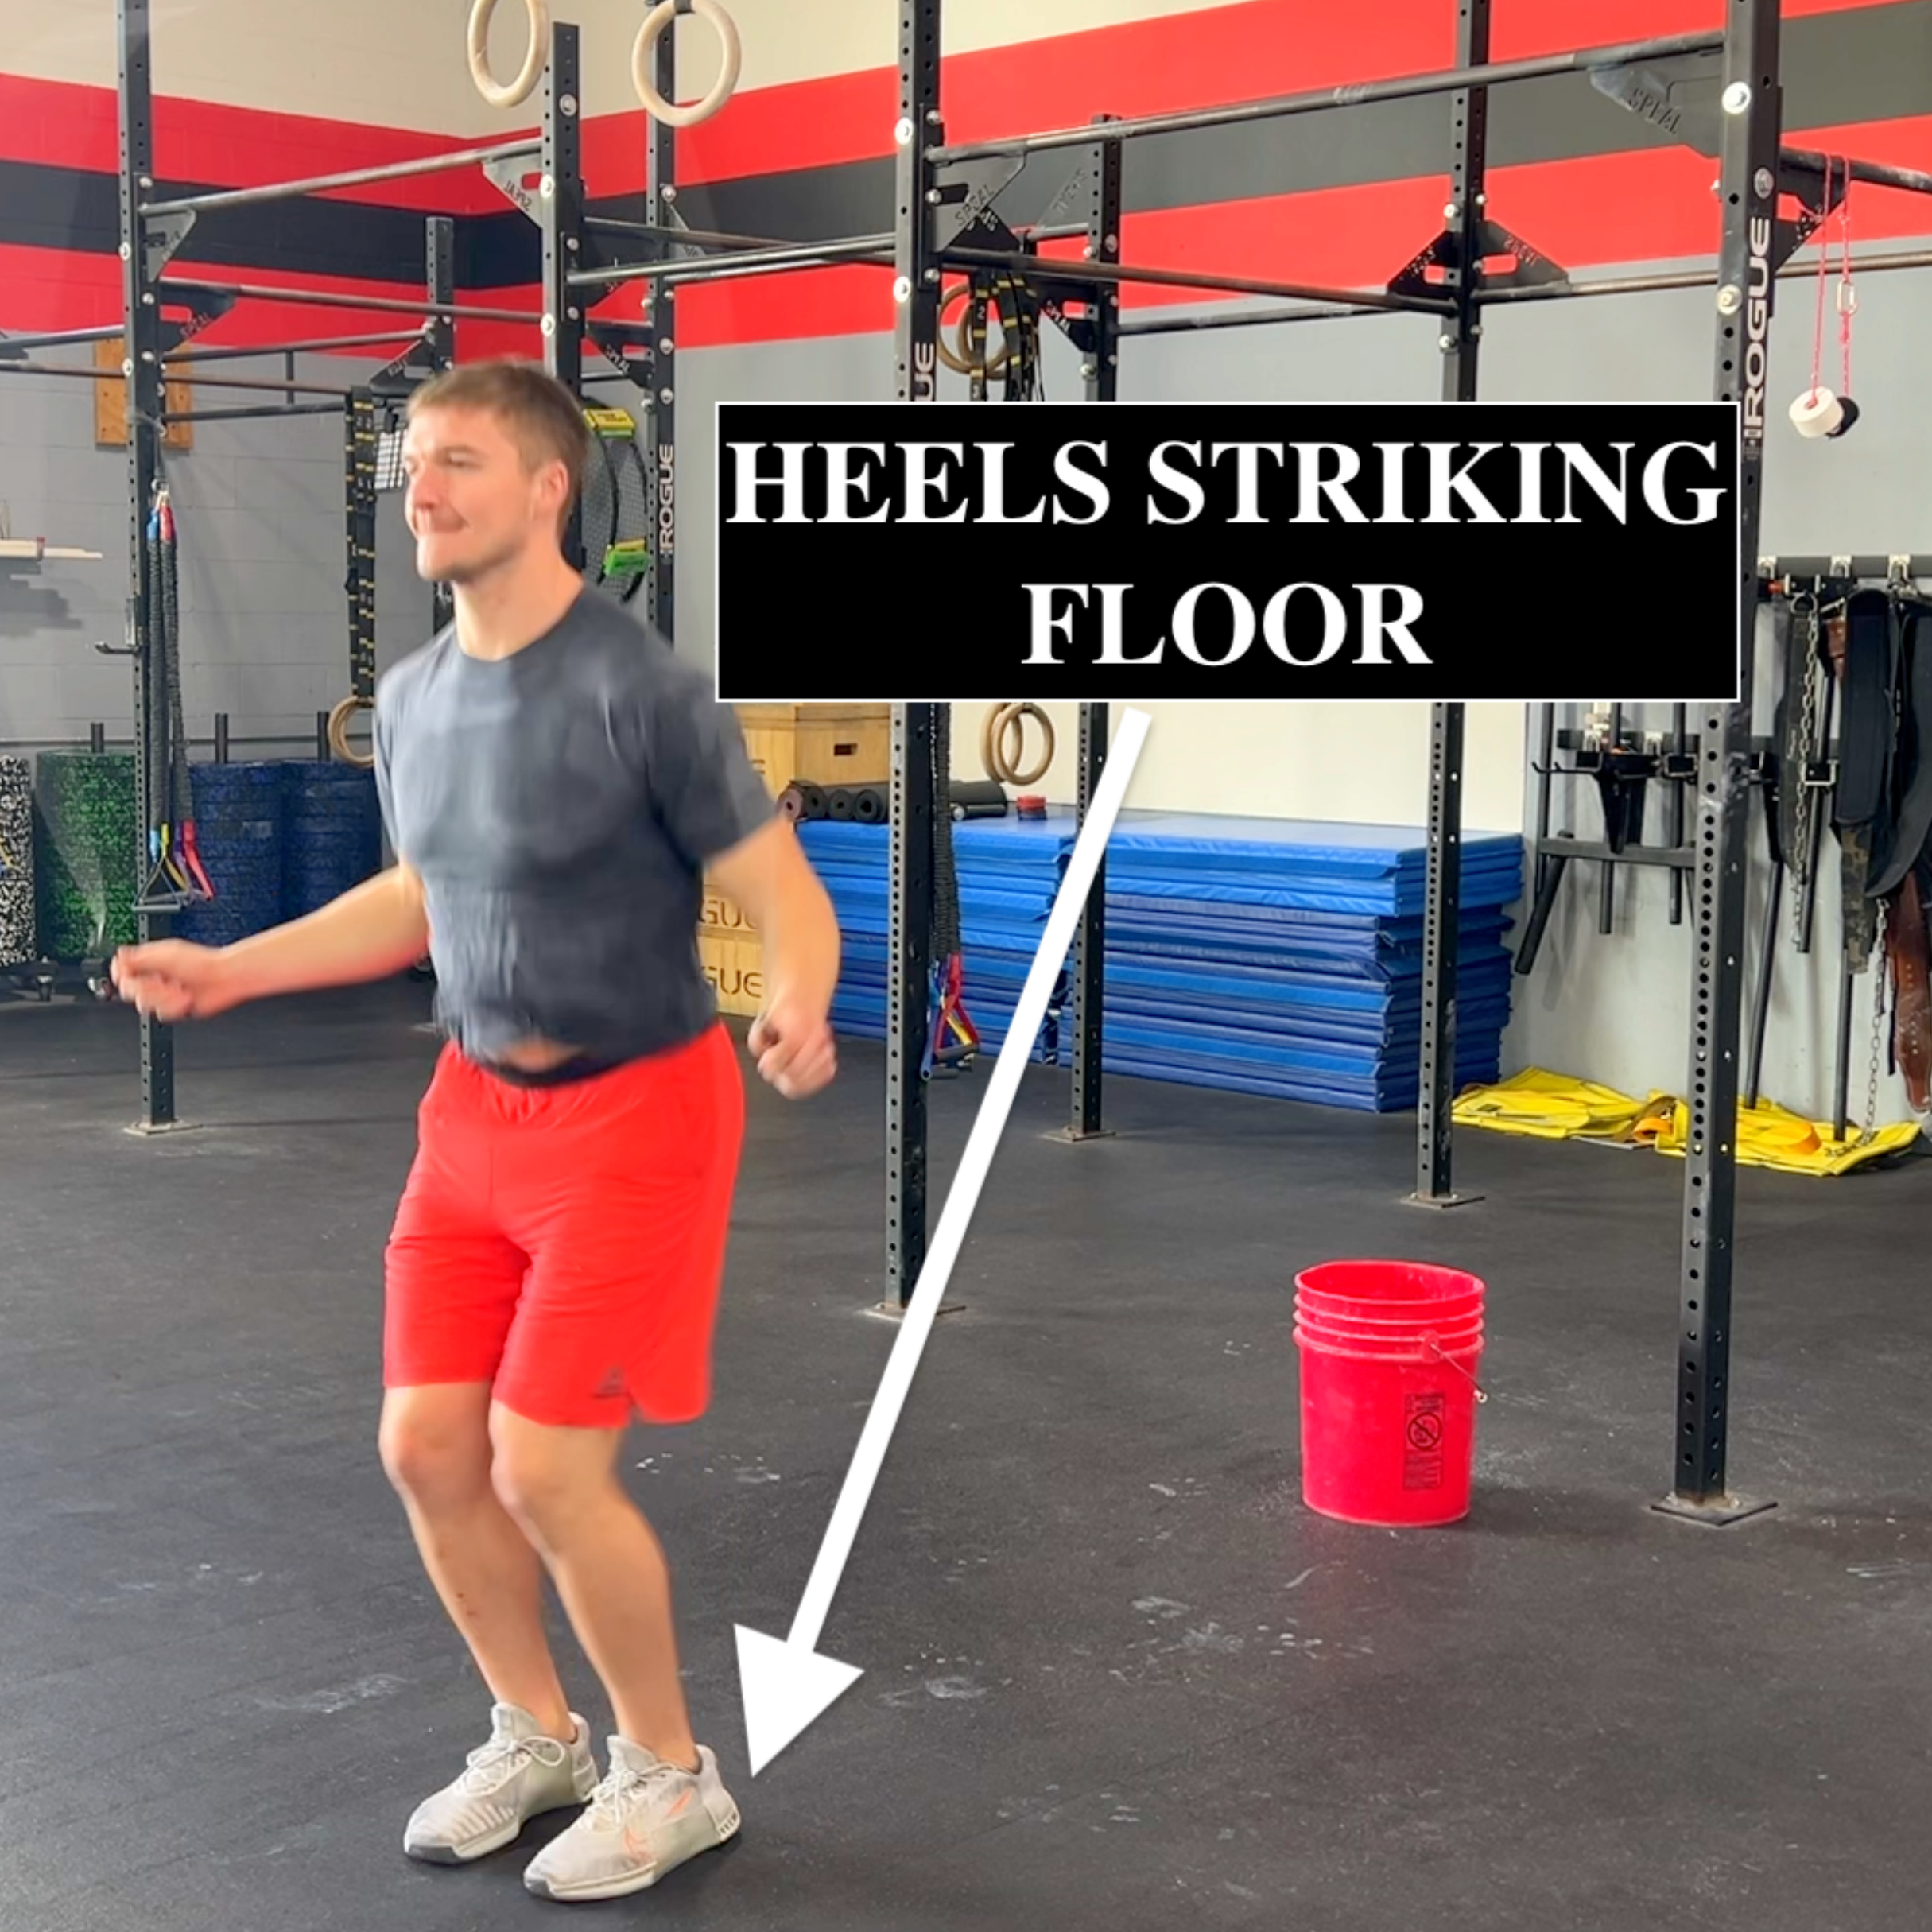
Heel Strike
Heel Strike
Your fault
→
The fix
Spencer's Cue
Test 2 — What Did You Notice?
5 Sets — What Did You Notice?
Be specific — this tells me exactly what your training needs to target.
Select one answer
Your Diagnosis
Your #1 Blocker
Wrist Speed & Rope Control
What your tests told us is that you have a rope control issue — your wrists aren't generating enough speed to spin the rope reliably. The fix is definitely not just more double-under attempts. We need to build better rope control from the ground up.
Your Week 1 Focus
Start with Lesson 1 to dial in your rope length, then go straight to Lesson 3 — The Swing. Don't move to Lesson 4 or 5 until your singles feel completely effortless.
Your rope control is actually solid — singles felt good. The real problem is the timing between your jump and the rope swing. This is a rhythm issue, which is good news — it's one of the fastest things to fix once you know what to listen for.
Your Week 1 Focus
Lesson 2 first for the three jump phases, then Lesson 3 for the exact timing of the swing. Don't skip ahead to the progressions until both are locked in.
The problem is a loss of body position during your reps. When your body position changes, it affects the rope's path — which causes you to trip. There are several types of body position breakdowns and Lesson 4 covers all of them.
Your Week 1 Focus
Go straight to Lesson 4 — Putting It All Together. This lesson is built specifically for your exact problem and will correct the body position fault showing up in your video.
Your double-under specific conditioning is your actual limiter. You can do double-unders, but when you add interference — other movements, elevated heart rate, accumulated fatigue — you gas out quickly. This is exactly what Module 2 is built for.
Your Week 1 Focus
Select your current level below to see your exact starting point and roadmap.
S
Spencer — Your Fix
2:55
Watched
Your Personalized Roadmap
Where are you right now?
Start at Lesson 5 in Module 1 to build consistent sets of 20 first — this will make everything in Module 2 more effective.
5
Lesson 5: Practice & Progressions
Build your base of 20 consistent reps
6
Lesson 6: The 100:30:1 Challenge
After Lesson 5 is locked in
7
Lesson 7: Speedplay
Practice alongside Lesson 6
8
Lesson 8: Interference Training
Most important lesson for your problem
Go straight to Lesson 6 — the 100:30:1 challenge. While working through Lesson 6, also open Lesson 7 for Speedplay — practice these together. Then move to Lesson 8 — Interference Training. This is the most important lesson for your specific problem.